


Home Assistant is a free and open-source smart home ecosystem with near-limitless potential. Unlike proprietary systems from Apple, Google, and Amazon, Home Assistant lets you build more complex automations and use unique combinations of devices to do so much more.

What Is Home Assistant? And Why Isn't Everyone Using It?
Get to know this open-source locally-controlled smart home platform.
Setting Up Local Remote Access
The Mac mini makes a perfect Home Assistant server for a few reasons, not least the fact that it’s cheap, quiet, in plentiful supply on the used market, and can fit just about anywhere. That last point is an important one since it allows you to put your Home Assistant server anywhere you like, without having to worry about attaching a monitor. That said, you can do this on a MacBook (or any other kind of Mac) too, if you have a spare one lying around.
I’ll be running through this setup process on a headless Mac mini, which means it’s a Mac mini that’s not connected to a screen that’s on. In reality, this is the same Mac mini that I’ll be using as a media center (and server). Being able to complete the bulk of the setup remotely and perform any admin duties from my MacBook Pro rather than turning the TV on is much more convenient.
So the first thing I’ll be doing is enabling remote access from local devices using Apple’s built-in VNC server. Ironically, this requires that your Mac mini be connected to a display so you can set everything up.
On the Mac mini we’ll be using as a Home Assistant server, head to System Settings > General > Sharing > Remote Access and click the “i” button next to it. I personally opened up the floodgates here as it’s just my personal network, and I wanted to be able to configure my server from pretty much any device.
First, turn on “Remote Management” and enable “Anyone may request permission to control screen” and “VNC viewers may control screen with password” and then set a password. Now click “Options” and enable additional settings like “Observe” and “Control” along with anything else you want to do. Click “OK” and then “Done.”

You can now access the machine using a VNC viewer on the same network, like the one that’s already built into macOS. Launch Finder and then hit Command+K (or Go > Connect to Server). Now type in the address of the machine on your local network. You’ll find this under System Settings > Sharing > Local hostname on the machine you’re hoping to access.

My Mac mini is simply called “Tim’s Mac mini” so to access it, I typed vnc://Tims-Mac-mini.local and hit Enter. All of a sudden, I have local access!
Create a Virtual Machine in VirtualBox
We’ll be running Home Assistant within a virtual machine that stays active on your Mac 24/7. The easiest way to do this is using VirtualBox, which now has both Intel and Apple silicon versions. The first step is to download the correct version from the VirtualBox downloads page.
Not sure which version to get? On your server Mac click Apple > About This Mac. If you see “Apple” listed under the “Chip” field then you’ll need the “Apple Silicon Hosts” version. If you see “Intel” then get the “Intel Hosts” version.
Once the app has been downloaded, open the DMG you downloaded and install the software by running the PKG file.

Virtualbox Now Runs on Apple Silicon, Here's What Works (and What Doesn't)
Mac users finally have another free virtualization option to choose from.
Before running the app, we can save ourselves a bit of time later by opening up System Settings > Privacy & Security > Accessibility and dragging the “VirtualBox” icon from Applications into the settings window. Now do the same for System Settings > Privacy & Security > Input Monitoring, authenticating as necessary. This will make it easy to use your mouse and keyboard within the Home Assistant virtual machine without restarting it, should you need to.

Now open the VirtualBox app in your Applications folder, and at the top of the screen in the menu bar click Machine > New. A new window will open using which you can give your virtual machine a name (I chose “Home Assistant”). Leave the .ISO field blank and make sure that the “Type” is set to “Linux,” the “Subtype” is set to “Oracle Linux,” and the “Version” is set to “Oracle Linux (ARM 64-bit).”

Hit “Next” and set up your virtual machine’s hardware configuration. Home Assistant’s minimum recommendations are 2048MB of RAM and 2 virtual CPU cores, which is what I’m using here. You should also make sure the “Enable EFI” box is checked or your machine won’t boot. Click “Next” again.

Now it’s time to set up the virtual drive. We won’t be creating a drive, but downloading one instead. Head to the Home Assistant macOS setup page and download the relevant VirtualBox image (either an Intel or Apple silicon VMDK file). Once downloaded, move the file to a suitable location (you’ll be relying on this, so don’t leave it in your Downloads folder).
Now go back to VirtualBox, select the “Use an Existing Virtual Hard Disk File” option, and click the file icon next to the box followed by “Add” to locate the file you just downloaded and then select it. Lastly, hit “Next” followed by “Finish.”

There’s just one setting we need to change to make sure your Home Assistant server has a network connection. Right-click (Control-click) on the virtual machine you created in VirtualBox, then click “Settings.” Under “Network” use the “Attached to” drop-down to select “Bridged Adapter” then choose the relevant network interface under “Name.” I picked “en1” as that’s the Wi-Fi connection I’ll be using, if your server is connected via Ethernet this is likely “en0” instead.

You can find out which hardware refers to which identifier by running the following command in Terminal (on your server):
networksetup -listallhardwareports
Click “OK” to save your settings. The nitty-gritty is done!
Setting Up Home Assistant
Now it’s time to run your virtual machine within VirtualBox by selecting it and clicking “Start.” You’ll see your server spring to life, just let Home Assistant get going and do its thing. Eventually, you’ll see a success message like the one below along with some URLs and IP addresses that will come in handy.

As noted, you can head to homeassistant.local:8123 or use the IP address of the local machine from any computer on your local network. Try it now and you should see a screen like this:

You’ll see that Home Assistant is still getting everything ready. Let it do its thing for around 20 minutes. Refresh the page until you see the “Create My Smart Home” button. Once everything is ready, power off your virtual machine and launch the Terminal app on your server.
We need to run the following command in order to tell the machine to use the discard command to automatically shrink the drive to free up space (something that doesn’t happen automatically by default):
VBoxManage storageattach Replace “SATA” with the type of storage your machine uses. For me, the machine's name was Home Assistant, which requires a backslash in order to indicate a free space within the command, so I typed Home\ Assistant instead.
For the type of storage, which you can find listed in the VirtualBox virtual machine settings, I’ve used VirtioSCSI instead. So within Terminal, I ran the following command:
VBoxManage storageattach Home\ Assistant --storagectl "VirtioSCSI" --port 0 --device 0 --nonrotational on --discard on If you see an error about the name or the type of storage, you’ll know you’ve got something wrong. If you don’t see an error and the command returns nothing, it worked.
The Finishing Touches
Last but not least, I recommend installing free app Amphetamine to keep your server awake. This will ensure that your Home Assistant installation is always running and available in the background, otherwise it will cease working whenever your Mac goes to sleep.

12 Single-Purpose Mac Apps I Couldn't Live Without
Apps that do one thing well, rather than trying to do it all.
With the app downloaded and running, click on the Amphetamine logo in the menu bar at the top-right corner of the screen. From here, click “Indefinitely.” Click Amphetamine again followed by “Settings” and enable all of the “Launch and Wake Behavior” checkboxes so that Amphetamine starts up when your Mac does and triggers a session.

Move to the “Session Defaults” tab and make sure “Default Duration” is set as “Indefinitely” and enable the “Allow display sleep” option if relevant. You’re now done and can close the VNC session if you like.
Now the Fun Begins
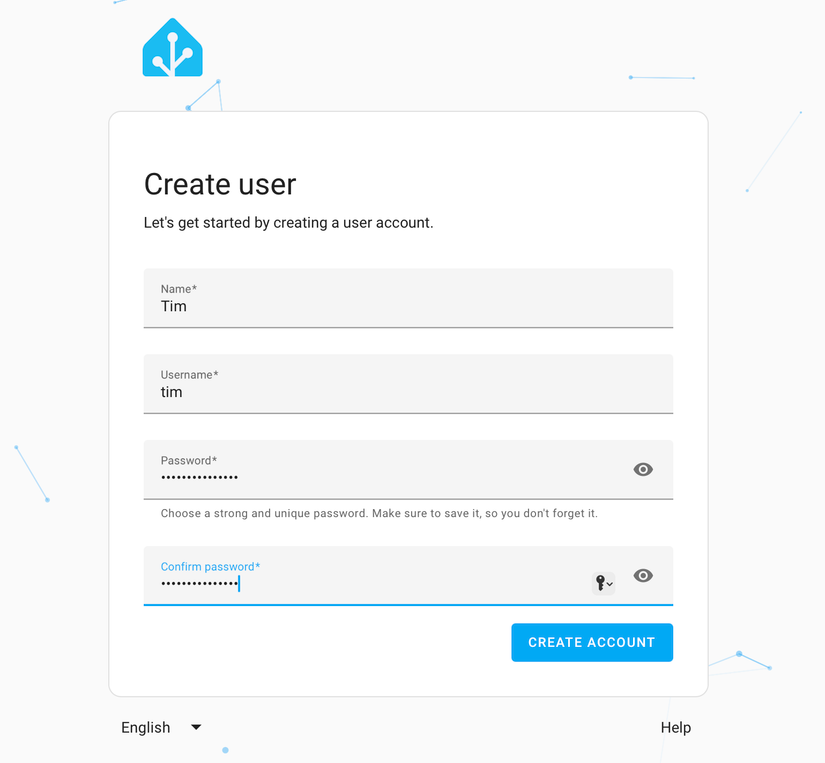
Now it’s time to actually set up your smart home. Launch a web browser from your device of choice (that's on the same local network) and head to homeassistant.local:8123 in a web browser. As long as you see the blue setup button, you’re good to go.

Click on it and start creating your smart home by setting up a user, setting a home location, and deciding whether you surrender analytic data. Eventually, Home Assistant will report any compatible devices and dump you on the dashboard.
Use the “Settings” menu to find integrations, add other devices, map out your home with zones, build complex automations, and much more.
If you've followed along, you now have a working Home Assistant server on your Mac mini (or another Apple computer, there's nothing inherently specific to the Mac mini here). Now it's time to dig into what's possible, including complex Home Assistant automations, adding smart speakers to your smart home server, and even using an old tablet like an iPad as a dashboard.