Many prefer working in Microsoft Excel using mostly their keyboard, while others like using their mouse. However, you don't have to be one or the other! Using them both at the same time is a great way to select, copy, and insert things in Excel in a single action.
Selecting Non-Adjacent Cells, Ranges, or Objects
Clicking and dragging your mouse over adjacent cells selects them, but what about selecting cells that aren't next to each other? The answer is to hold Ctrl as you click the individual cells.
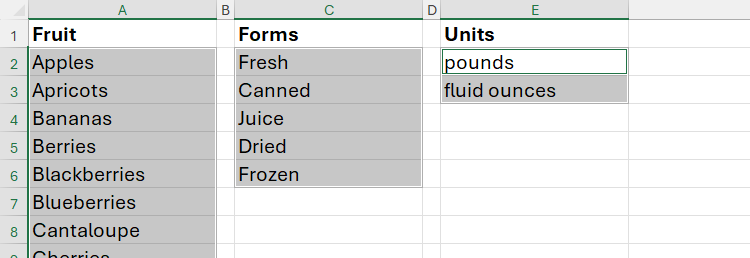
Let's say you want to make the text in cells A1, C1, and E1 bold without applying the same formatting to cells B1 and D1. To do this, select cell A1, hold Ctrl, and then select cells C1 and E1.

Now, press Ctrl+B to apply the bold formatting to the selected cells.
When you use the Ctrl+click combination, the final cell you select remains white to indicate that this is the active cell. In other words, if you start typing, the input will only appear in the white cell. To activate a different cell in the selection, press Tab or Shift+Tab.
You can also hold Ctrl while selecting non-contiguous ranges.
The same applies to rows and columns. For example, if you want to increase the width of columns B and D, select column B by clicking the column header, then hold Ctrl, and then click the header of column D.

Now, click and drag the left-right arrow cursor that appears when you hover over the border between the headers of columns B and C to change the width of all the selected columns simultaneously.

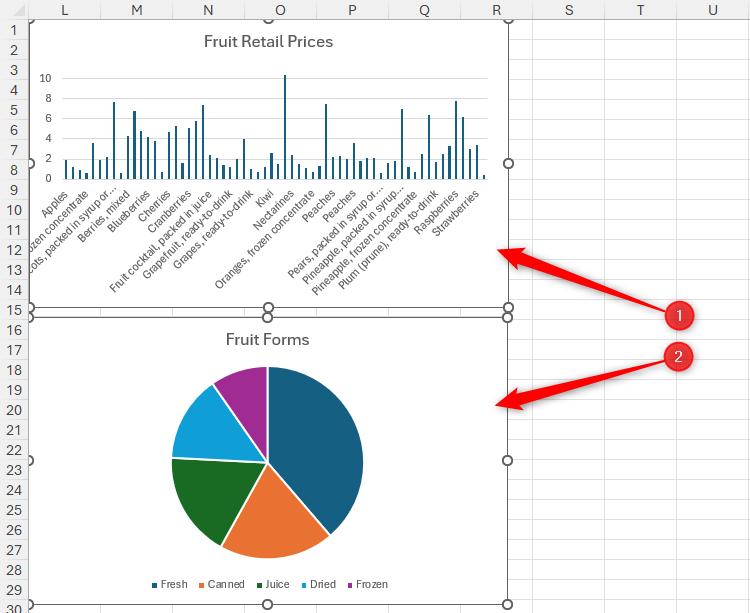
Using the Ctrl+click combo isn't reserved for selecting non-adjacent cells. Indeed, you can use the same shortcut to select other objects, like shapes, text boxes, and charts, which is particularly handy if you want to cut and paste them into an Excel dashboard or keep their formatting consistent.

How to Format Your Chart in Excel
Excel offers (too) many tools for making your graphs look the part.
Selecting a Large Range of Cells
You probably already know that you can select a range by clicking and dragging your mouse over more than one cell. However, if you want to select a large area, clicking and dragging can take too much time.
Instead, select the top-left cell of the range you want to select, then navigate to the bottom-right cell, hold Shift, and click it. In fact, as long as the first cell you select is in one of the corners of the range, you can go in any direction.
This is a handy shortcut if the range you're selecting is part of an even larger range. To select a whole, continuous range, select one of its cells, and press Ctrl+A.
You can also use the click-Shift-click combo to select adjacent rows or columns—simply select the first column or row by clicking its header, hold Shift, and then select the last.
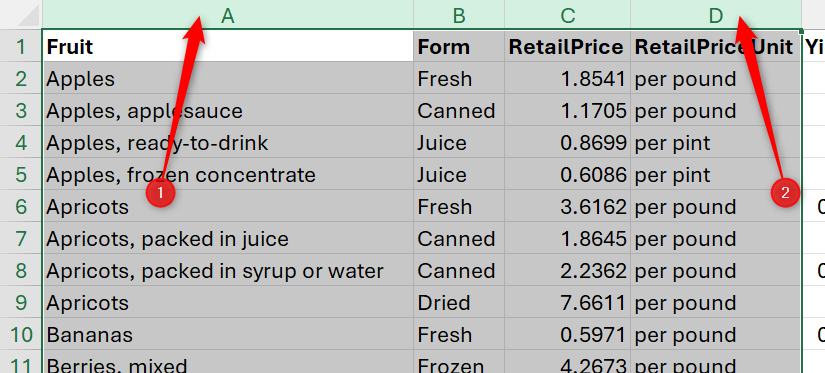
When you use the click-Shift-click combination, the first cell you select remains active. To activate a different cell in the same row of the selection, press Tab and Shift+Tab. To move up and down the selected columns, press Enter and Shift+Enter.
Duplicating the Selection (And Overriding Existing Data)
You can move cells, rows, or columns by selecting, clicking, and dragging them to a different area on a worksheet.

When you do this, if the new location already contains data, you'll see a dialog box asking you whether you want to override that data.
You can only move more than one cell, row, or column at the same time if they are adjacent to each other.
However, if you hold Ctrl while performing this click-and-drag action, the content of the selected range is duplicated (rather than moved to) wherever you drop it, replacing anything already there.

With this keyboard-mouse combo, Excel doesn't warn you that you're overriding existing data, so use this shortcut with caution.
This combination also works with rows and columns—select the row or column you want to duplicate, hold Ctrl, and click and drag it (from the edge of the range, not the row or column header) to its new location, where it will replace any data that's already in the destination row or column.

Moving the Selection (And Inserting It Between Existing Data)
If you click and drag a selection to an area already containing data, by default, it replaces it. However, you might want to move and insert the selected cells into an occupied range without losing any data.
To do this, after selecting the cell or range you want to move and insert, press Shift, and drag it to its new location. As you do this, a thick, green line indicates where the selection will be inserted.
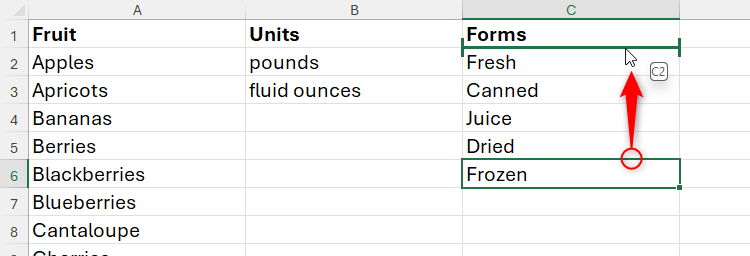
Once you're happy, release your mouse and keyboard, and see that you've moved the cells without deleting any existing information.
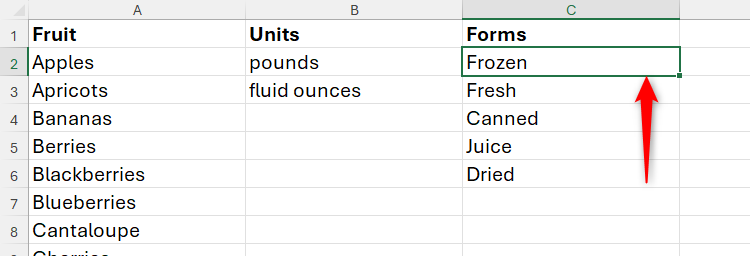
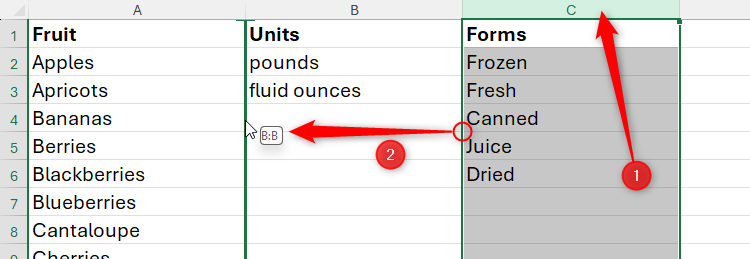
You can also follow the same principle to rearrange whole rows or columns.
Duplicating the Selection (And Inserting It Between Existing Data)
The previous two keyboard-mouse combos involved moving or inserting cells, rows, or columns. However, you can do both at the same time by pressing Ctrl+Shift as you drag.
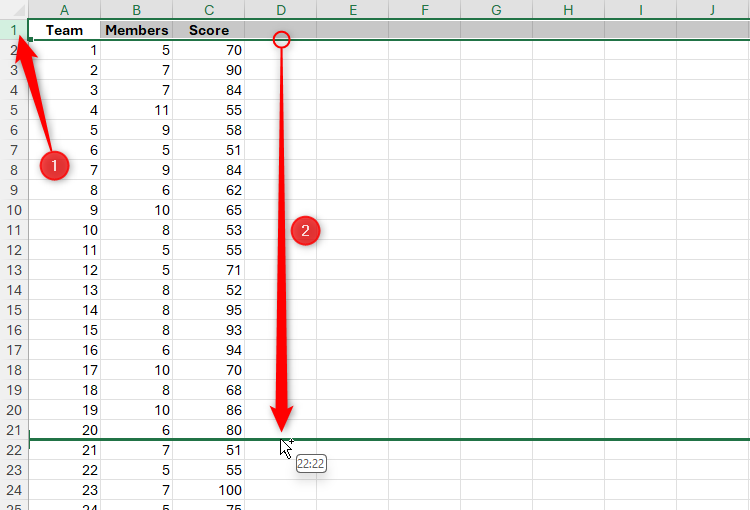
In this example, I want to duplicate the header row after every 20 rows of data so that the information is easier to read when printed. To do this, I'll select the header row, hold Ctrl+Shift, and then click and drag it to the new location, guided by the thick, green line that appears.

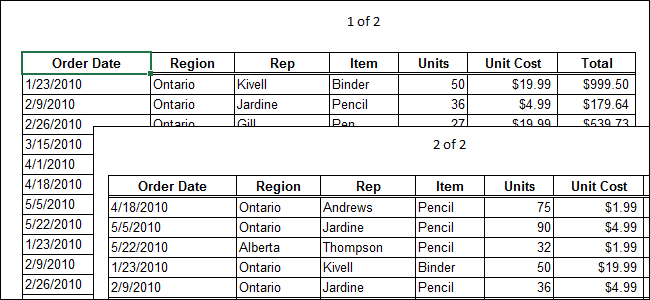
How to Repeat Specific Rows or Columns on Every Printed Page in Excel
Print row and column headers (also called print titles) on every page so that your data is properly labeled.
As you can see in the screenshot below, a copy of the header row has been inserted between the data for teams 20 and 21, and no data has been overridden. I can then go ahead and repeat this process as I move down the dataset.

.
Organizing your spreadsheet using keyboard-mouse combinations isn't the only way to speed up your workflow in Excel. For example, you could use the name box for navigation, freeze panes to avoid overscrolling, and personalize the Quick Access Toolbar.


